The aim of this guide is to teach you, step-by-step, how to write blog posts for your eCommerce store to aid your marketing efforts and to improve customer engagement and reach.
Today, blogging is not just a hobby of teenagers or those who love writing about anything they experience in their lives.
Businesses and professionals use blogs to engage with their audiences and to ultimately improve their (inbound) marketing strategies for a more positive ROI.
An eCommerce website is just one of the many online business platforms where a blog can thrive. The reason behind this is because you already have customers – a.k.a. targeted website visitors, long-timers and new ones – that are more than willing to stop and shop once in a while.
Before, online customers would just pick the product they like, pay the amount, and then go to the next online store. But now, many customers read blog posts or any informative and helpful write-up regarding a product they like before they make a purchase.
You as an eCommerce owner already have the advantage of selling products that customers are searching for.
You just need to improve your marketing efforts with truly helpful, informative, and compelling blog posts to engage with your existing customers, their referrals, and prospects.
In writing a blog post, you and your writer should be able to determine a good topic that will fit your products and your business as a whole.
You need to write posts with your customers (and would-be customers) in mind in order to truly get their attention and to supply the information they need to help them decide and make a purchase.
Step 1: Brainstorm With Your Writer
You and your writer should find time in brainstorming especially if this is your first time to write and publish a blog post on your eCommerce website.
Take this time to jot down all possible topics you can post and come up with a posting schedule in order to maintain consistency on your blog.
It is also ideal to have brainstorming sessions with the rest of your staff to get their inputs on ideas you have in mind.
You can set a schedule just for this activity in order get everyone’s inputs so that you’ll always have a list of information, ideas, and possible topics to blog about.
Step 2: Check Your Store, Products And Customers’ Feedback For More Ideas
Writing a blog without an idea in mind could make or break your blog post. And it is not an easy task to just write without anything particular in mind.
Check your store and products for inspiration, and take note of everything you find interesting and worthy of a blog post.
You should also look at your customers’ feedback via emails they send to you – check all possible messages, good or bad, positive and negative.
The idea is to know what your customers want and what you have to offer by looking at your own store and your products. You can also ask your suppliers for, let’s say, new product lines that are about to be released – those are good ideas for succeeding posts.
Step 3: Make A List Of Keywords
Make a list of keywords that are relevant to your products and business. You can use Google Keyword Planner to check the traffic volume of the keywords that you have in mind.
You will need a Google account in order to access the keyword planner.
Note: Use keywords on the title and within the body of your post. Limit occurrence within the body 4 to 5 (ideal) times.
Step 4: Choose A Topic To Write About
With a list of ideas on hand, it will be easier for you to choose the right topic for your customers to read.
Put yourself in your readers’ shoes and ask yourself “why should read this blog post?”
The topic that you’ll choose should be able to address this question because that’s one of the reasons why readers visit a blog in the first place.
They may be looking for info about certain products in your store or answers to their questions, and your choice of topic should be able to address those.
You should check out this post by the ProBlogger where he shared a number of tips on how to choose a topic for a blog post.
Step 5: Craft A Working Title
With a topic in place, you will find it easier to craft a working title for your blog post. Like in the first steps, you can have a list of few working titles to work with and just pick the one that best suits the content of your post.
You can always edit your working title once your post is completed. You can make it more compelling, reflective and thoughtful for your readers.
Take note that a blog post title should capture your reader’s attention. It can be thought-provoking, funny, personal, controversial, in the form of a question, or an opinion.
Always remember that a title gives a hint and draws readers to read your post. You can finalize your working title and make it more compelling once your content is in place.
Here’s a very informative post that can help you in crafting good and compelling post titles for your blog.
Step 6: Create An Outline
Some bloggers create an outline and a template for their blog posts at the same time. You can also do this to help you stay focused while writing each section of the post.
On your outline, write the following sections:
- An introduction to the post should help your readers see a summary of what you are about to discuss on the post’s body.
- The body of the post should discuss your topic in detail. This is where your topic should address your readers’ concerns, questions, and needs.
- A conclusion is always a must for a blog post because it sums up your readers learnings.
Even with a simple outline, you will be able to think and write about specific elements that you can discuss on each section of your blog post.
Step 7: Write Your Blog Post
The very first part of your post’s body is the called the opening line. You should use this very first sentence to the fullest to capture the attention of your readers, so that they will stay and read on until they finish he post.
In writing the body of your post, make sure to include the “what’s in it for me” element for your readers. This could be several benefits, useful information, or facts about your topic.
If you are going to discuss a product, for example, you can write a review that tackles both sides of the coin. The perspective of your customers and you as a business is one concept that you can write a post on.
If you are selling wines, for example, it is a good idea to use a storytelling approach that discusses the history of the top wines in your eCommerce store.
This doesn’t just make the blog post interesting and informative, but it is also entertaining at the same time.
One of the key factors to remember when writing the body of your post is to make it matter to your readers.
Step 8: Add A Call To Action
This part of your blog post is usually the very last sentence where you ask them to take action. It could be in the form of a comment, a social share or a like.
Having a call to action encourages readers to engage with you and other readers, making your blog post alive and pleasing to the eyes of the search engines.
Step 9: Proofread and Edit Your Post
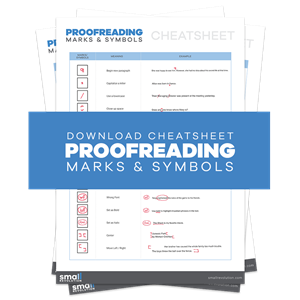
Take the time to proofread and edit your post for any typo error and grammar. You can seek the assistance of one or two of your staff members to help you proofread the final draft.
Step 10: Add Links To Your Blog
There are two types of links you can use on your blog. First are internal links or links to other posts and pages that are relevant to your new post.
The second are outbound links to references you’ve used on your post. Make sure to have both types of links on each post you publish to increase your blog’s credibility and to make it search engine-friendly.
Step 11: Add Photos
If you are to discuss a product that you sell in your eCommerce store, it is essential to use the photos that you already have. You may also request from your suppliers a copy of the best image that you’d like to include on your post.
You may also search and use photos/images from Creative Commons. Just don’t forget to use proper attribution and to link back to the originator and owner.
And don’t forget about using ALT tags for your photos when you upload them onto your blog. ALT tags are used to describe photos/images on web pages to make it easier for search engines to ‘read’ them.
Step 12: Promote Your Post
There are numerous methods to promote your blog post to get more readers onto your blog.
You can use social networks such as Twitter, Facebook, Google+, Pinterest, and others to share the link to your post. If you have subscribers, you can send them email alerts whenever you publish a new blog post.
Learn From Others
A properly planned and written blog post with readers in mind makes a better and more fruitful outcome. This is a beneficial way to gain more exposure for your eCommerce store while providing useful information to your readers, a.k.a. customers and prospects.
By now, more and more eCommerce store owners are learning the best practices of writing a basic blog post. But there are those who don’t seem to learn the right approach to writing simple posts with their customers in mind.
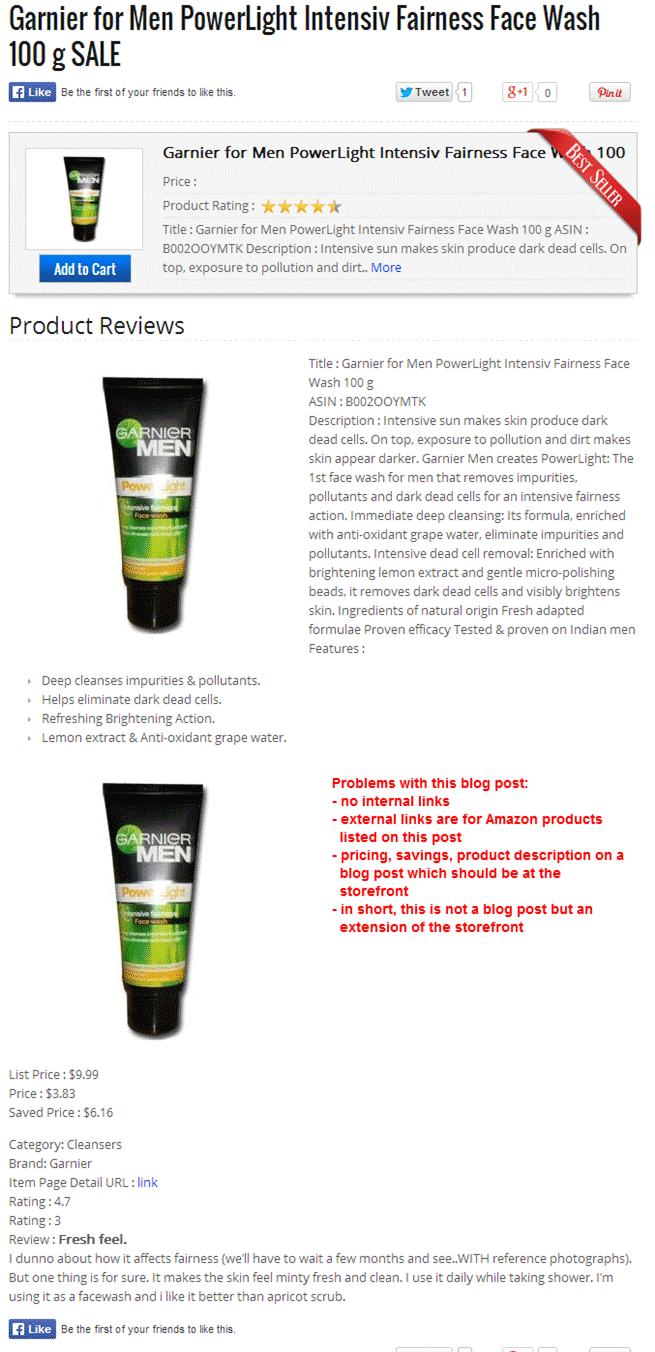
Below is an example of an eCommerce store that uses its blog like a storefront:

Blogging blunders can be prevented even before you write the first draft. You will always find websites that will teach you each and every little detail about blogging, so you’ll be able to succeed at winning new readers and turning them into customers in the long run.
You can check out CopyBlogger’s 11 Essential Ingredients Every Blog Post Needs (an infographic) which is a collection of the best tips that help make good blog posts. Comparatively, you should check out Hubspot’s How to Write a Terrible….Blog Post to see the opposite.
Final Checklist
Blogging is a must for any business today. It has become one of the most powerful tools that can help you bring in more prospects while providing value to all of your customers.
It is also a great way to improve your staff’s writing abilities which can be very useful to your business.
- Use your existing eCommerce store assets in crafting a blog post, and these are your customers’ feedbacks and emails, your products and business in general.
- Brainstorm, plan and come up with ideas together with your staff.
- Always create an outline to help you focus on the details later.
- Use keywords on post title and body.
- Add photos to make your post interesting and for easy social sharing.
- Add ALT tags when you upload your photos/images.
- Always add links to other posts/pages on your website.
- Add links to other websites particularly resources with helpful content.
- Proofread and edit every post.


